Sam's Microsoft Dynamics 365 Blog

Friday, 23 June 2023

Model-Driven App, Canvas App, and Power Pages

Model-Driven App, Canvas App, and Power Pages are all components of Microsoft Power Apps, a low-code development platform.

Each of these app types has its own characteristics and best use cases. Here's a brief overview of each:


Model-Driven App:

Model-Driven Apps are built around data models and provide a structured way to interact with complex data sets. They offer a more guided and structured user experience by leveraging the Common Data Service (CDS)/Dataverse or a custom data model. Model-Driven Apps provide pre-built components like forms, views, charts, and dashboards that are automatically generated based on the underlying data model. These apps are suitable for scenarios that involve working with structured data and require a higher level of customization and automation.


Canvas App:

Canvas Apps provide a highly customizable and flexible development experience, allowing you to design apps from scratch using a drag-and-drop interface. With Canvas Apps, you have complete control over the layout and functionality of the app. You can create responsive designs, integrate with various data sources, and leverage a wide range of controls and formulas to build the app logic. Canvas Apps are suitable for scenarios that require a high level of customization and flexibility, especially when working with multiple data sources or external APIs.


Power Pages:

Power Pages is a relatively newer concept introduced in Microsoft Power Apps. Power Pages combine the capabilities of both Model-Driven Apps and Canvas Apps, offering a hybrid approach. They provide a structured data model like Model-Driven Apps, but also allow for custom layout and design like Canvas Apps. Power Pages enable you to design rich pages using the app designer interface, combining pre-built components and customizations. They provide a balance between structured data modeling and flexible app design, making them suitable for a wide range of scenarios.


In summary, Model-Driven Apps are ideal for working with structured data and require extensive customization and automation. Canvas Apps offer maximum flexibility and customization options, while Power Pages provide a hybrid approach combining the best of both Model-Driven Apps and Canvas Apps. The choice between these app types depends on the specific requirements of your application and the level of control and customization you need.


Thanks for reading this article. Hope this Article will help you. Cheers!!!

Wednesday, 14 June 2023

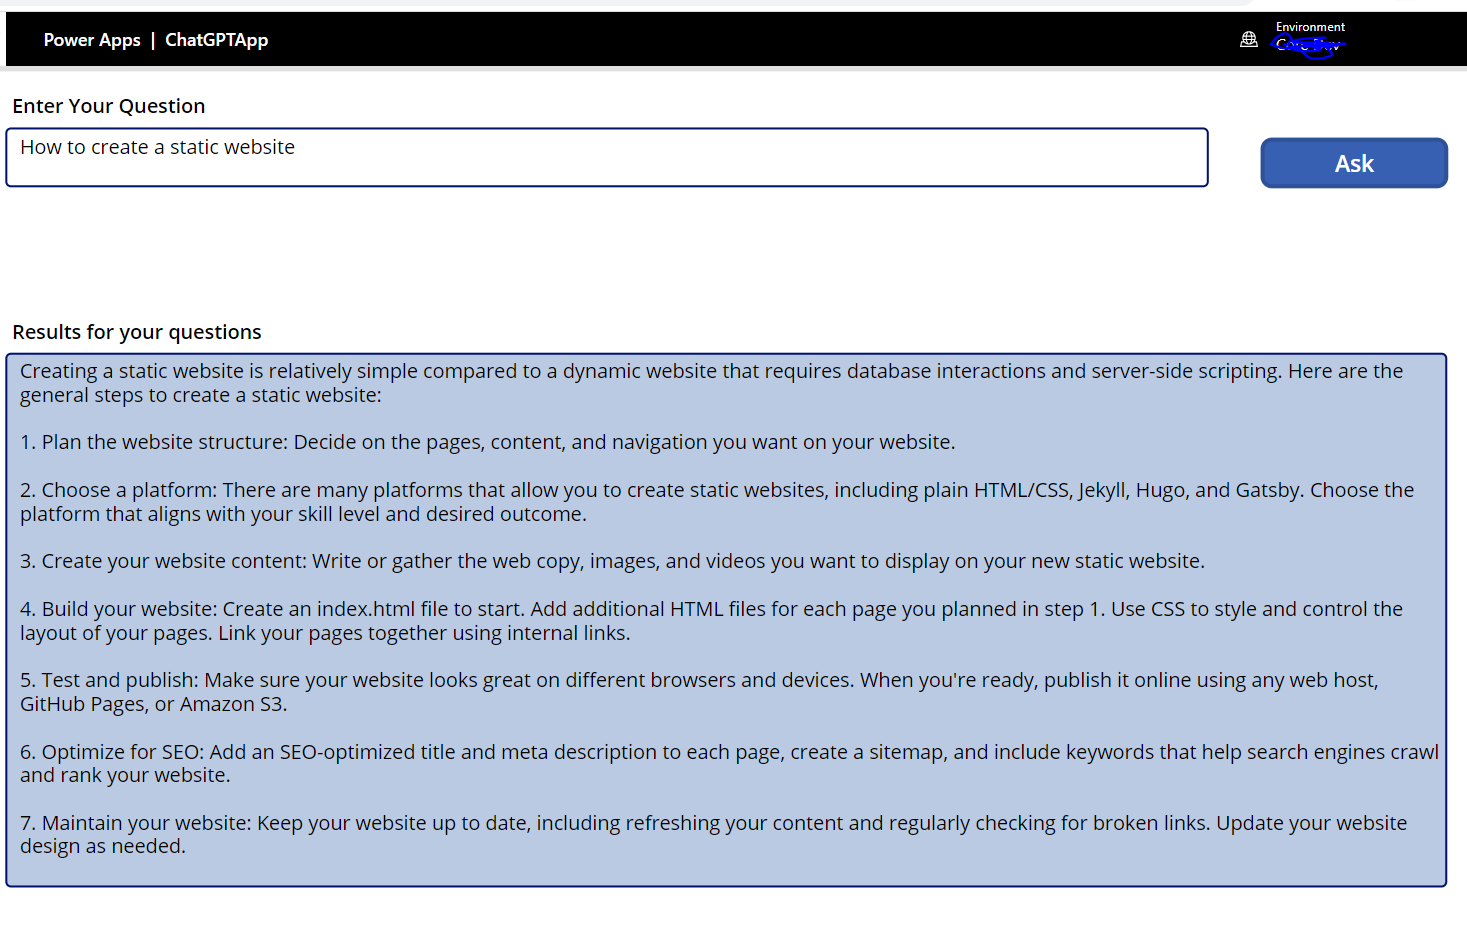
Integrate ChatGPT with PowerApps using Power Automate

ChatGPT is an advanced language model developed by OpenAI. It is specifically designed to generate conversational responses and engage in text-based dialogue. It belongs to the GPT (Generative Pre-trained Transformer) family of models. 

GPT models are based on the Transformer architecture, which is a deep learning model architecture known for its ability to process and generate sequences of data, such as text. These models have been pre-trained on large amounts of text data from the internet, allowing them to learn patterns, language structures, and context.

ChatGPT leverages this pre-training to understand and generate human-like text in a conversational manner. It has been trained on a diverse range of conversations and dialogues, enabling it to respond to user prompts or questions in a coherent and contextually relevant manner.

Users can interact with ChatGPT by providing text-based input or prompts, and the model generates responses based on its understanding of the given context. It can carry on multi-turn conversations, provide information, answer questions, and engage in interactive dialogue.

To integrate ChatGPT into PowerApps using Power Automate, you can follow these general steps:

  • Set up the ChatGPT API: Choose a ChatGPT API or service provider and obtain the necessary credentials or access keys.

 ChatGPT API reference document: -  https://platform.openai.com/docs/api-reference


  • Create a new flow in Power Automate: Go to the Power Automate portal (flow.microsoft.com) and create a new flow.
  • Set the trigger: Add a trigger to the flow by selecting the appropriate PowerApps trigger action. For example, you can use the "PowerApps button" trigger or the "PowerApps - When a record is created, updated, or deleted" trigger, depending on your requirements.


  • Initialize variables: Add actions to initialize variables that will store the user input and ChatGPT response. For example, create a variable called "UserInput" to store the user's message and a variable called "ChatGPT response" to store the generated response.

  • Connect to the ChatGPT API: Add an "HTTP" action to make a request to the ChatGPT API. Configure the action by specifying the API endpoint, headers, and authentication if required. Pass the user input stored in the "UserInput" variable as a parameter to the API.


  • Parse the API response: Add actions to parse the response received from the ChatGPT API. Extract the generated response from the API response object and store it in the "ChatGPT response" variable.


  • Return the response to PowerApps: Add a "Response" action to send the generated response back to PowerApps. Pass the "ChatGPT response" variable as a parameter.


  • Save and test the flow: Save the flow and test it to ensure it runs without errors. You can test it by triggering the flow from PowerApps or using the built-in test functionality in Power Automate.
  • Update PowerApps: In PowerApps, update the chat interface to display the conversation history and handle user input. Add a button or any appropriate control that triggers the flow created in Power Automate when clicked.


  • Handle the flow response in PowerApps: Once the flow is triggered and the response is received, update the chat interface in PowerApps with the generated response. For example, you can update a text box or a data source to display the conversation history.

Set(
    result,
'PowerApps-ChatGPTIntegrationFlow'.Run(TextInput1.Text).response
)


  • Test and refine: Test the integration thoroughly to ensure the chat functionality works as expected. Iterate and refine the implementation based on user feedback and identified improvements.


Thanks for reading this article. Hope this Article will help you. Cheers!!!

Wednesday, 17 March 2021

Graph APIs Calling option in "HTTP Request" connector in Power Automate

Graph APIs Calling option in "HTTP Request" connector in Power Automate. I have followed some below steps for calling Graph API:

a. Registered an App in Azure Active Directory and got Tenant ID, Client ID, Client Secret.


b. Created a Power Automate Flow and added HTTP request as an Action. In Authentication option inside HTTP action, selected Active Directory OAuth and added value for Tenant, Client ID, Secret etc.


Thanks for reading the article. Hope this Article will helpful for you. Cheers!!!

How to Get the Power Automate Flow Run URL Using Expressions

In many Power Automate projects, especially those involving approvals, error handling, or audit logs, it’s helpful to have a direct link to ...